
Talk turkey to me! This Thanksgiving is going to be a little bit different in size, but that doesn’t mean you can’t go all out on your decorations.
We love a good theme and this fun DIY project is inspired by a turkey. This quirky little place setting is sure to add some color and fun to your table.
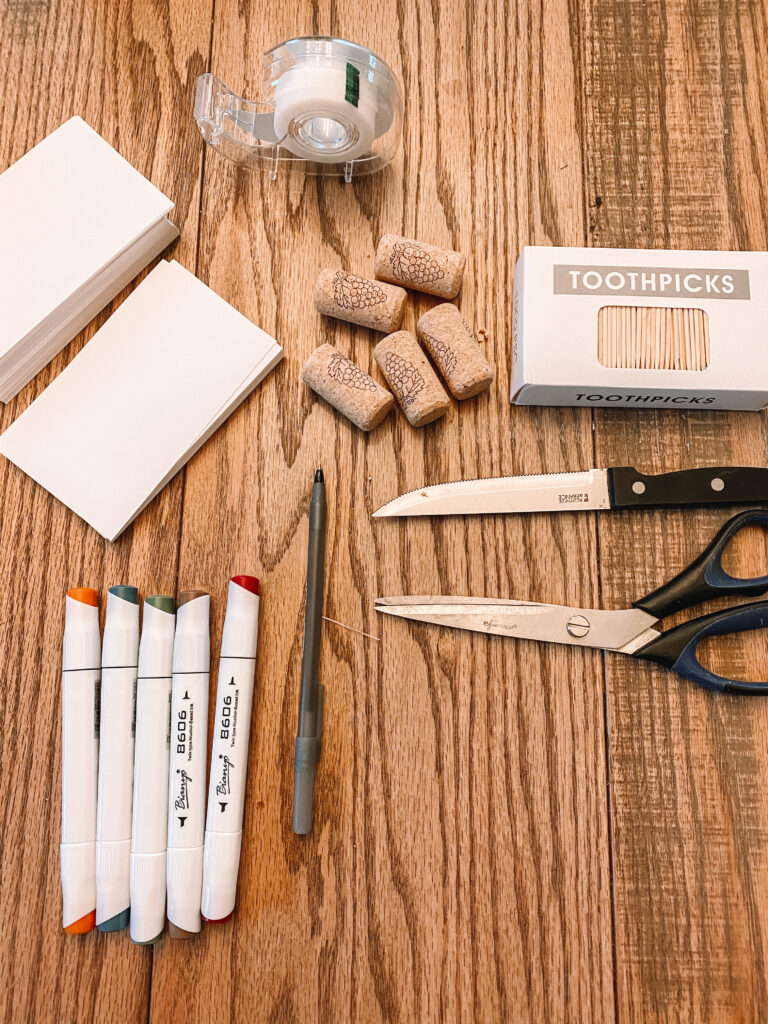
Everything you need you hopefully have already. If you don’t have index cards, you can just use paper.
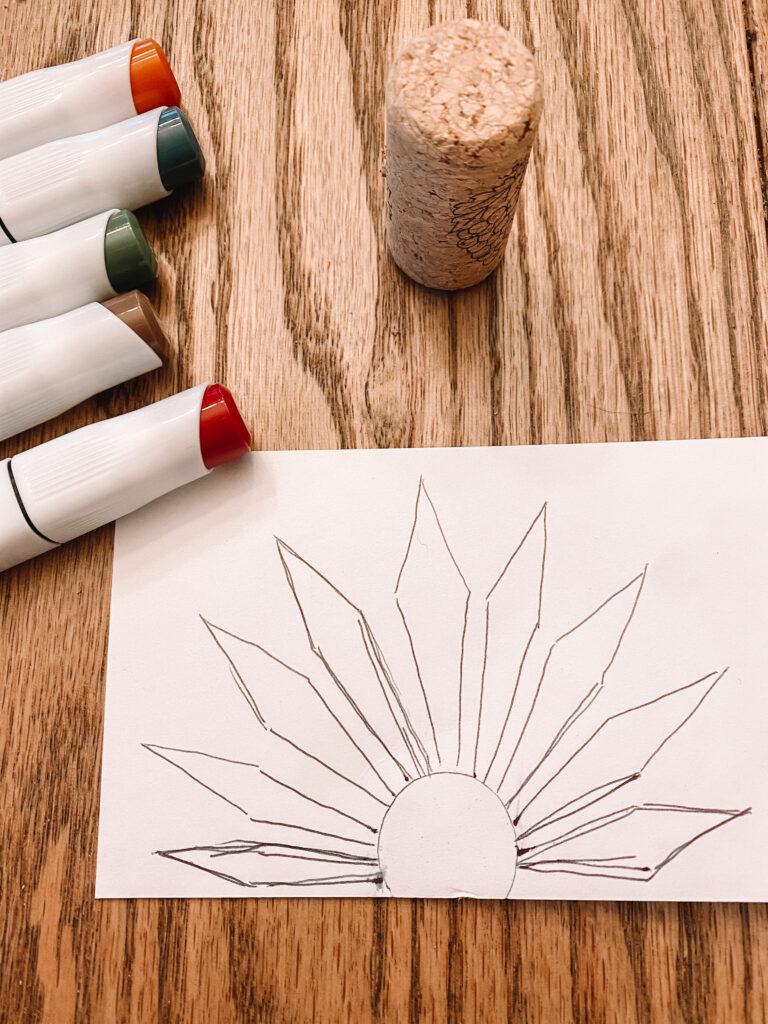
Loosely draw a small circle with a pencil or pen, I used the wine cork to create the outline. Around the circle, draw the shapes of your tail feathers. You can do a rough drawing or do it precise, you will end up coloring over the lines.
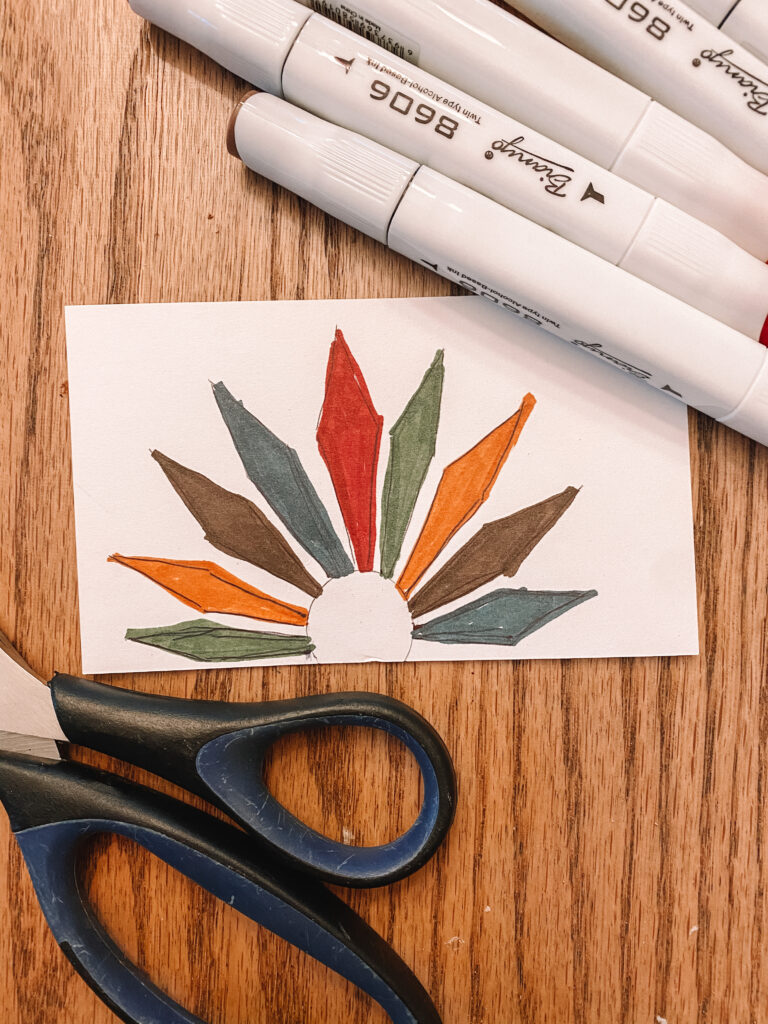
Using a few different colors of your choice, color in each feather. This doesn’t have to be perfect as you will be cutting these out.
Carve an opening into the top of the cork. I used a knife, this can be a little tricky so take your time. You want to cut deep enough to hide the circle shape.
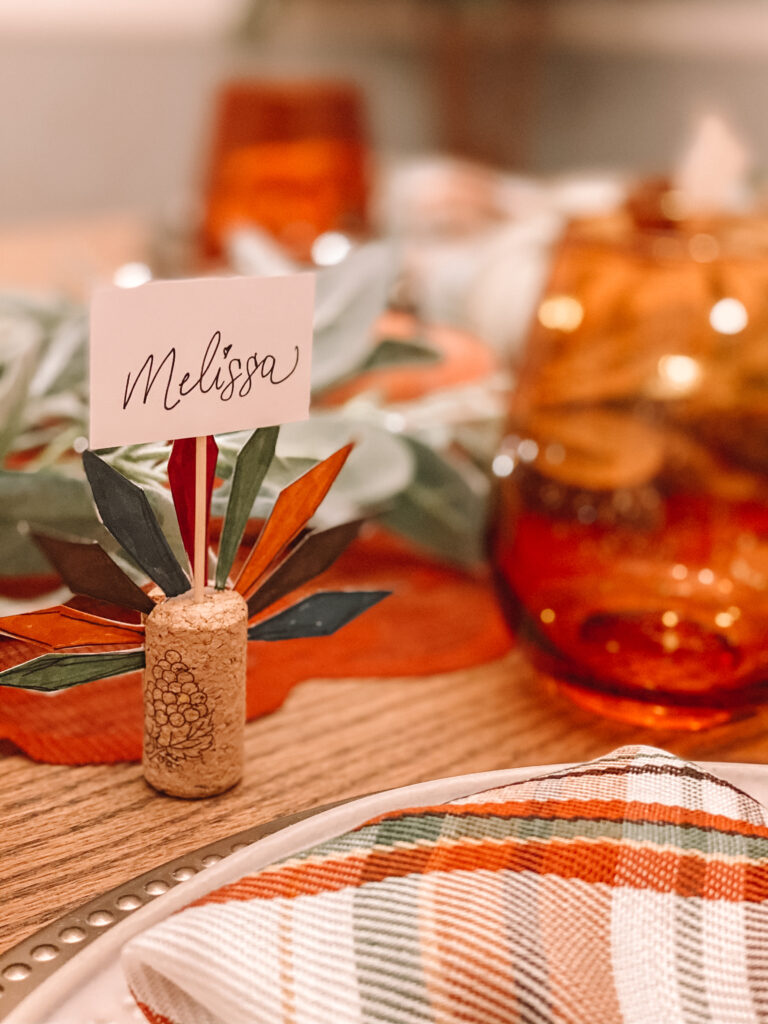
Congrats, you’ve created an adorable turkey. Now make a little sign with your guest name and tape it onto a toothpick. Lodge the toothpick into the top of the cork until it feels stable.
Now you have a little cuteness and personalization to add to your Thanksgiving table.

Turkey Place Cards
Materials
- Index Cards or Paper
- Corks
- Tape
- Scissors
- Markers
- Pen or Pencil
- Toothpicks
Instructions
- Take an index card and use one of the corks to trace and create a circle outline near the bottom of the card.
- Around the circle, draw the shapes of the tail feathers. I started in the middle and worked my way down from there.
- Using a few different colors, color in each feather.
- Take your scissors and cut around each wing, leaving the circle attached.
- Carve an opening into the top of the cork, deep enough to fit and hid your white circle.
- Stick your turkey tail feathers down into the cork.
- Use a piece or paper or index card to write your guest name onto. Tape it onto a toothpick and lodge the toothpick into the top of the cork until it feels stable.
Next up on our craft journey, is something I’ve been wanting to try for a while and it turned out to be super easy. Making a wreath out of faux flowers & an embroidery hoop. It took me 15 minutes to make and I am obsessed with how it turned out.
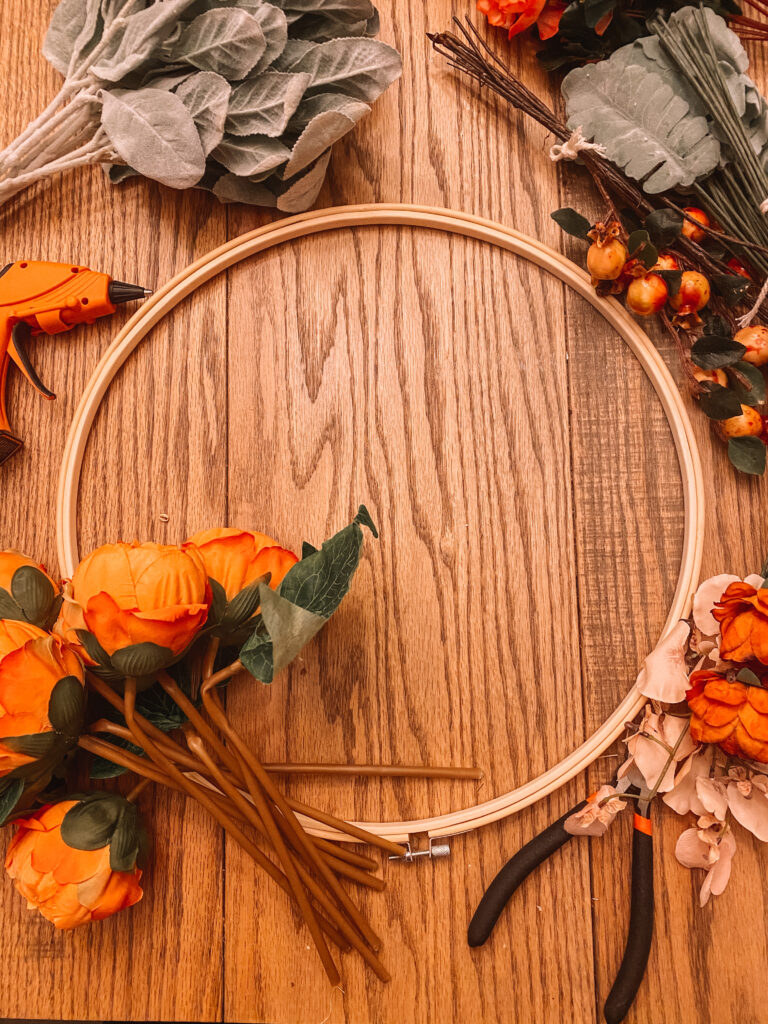
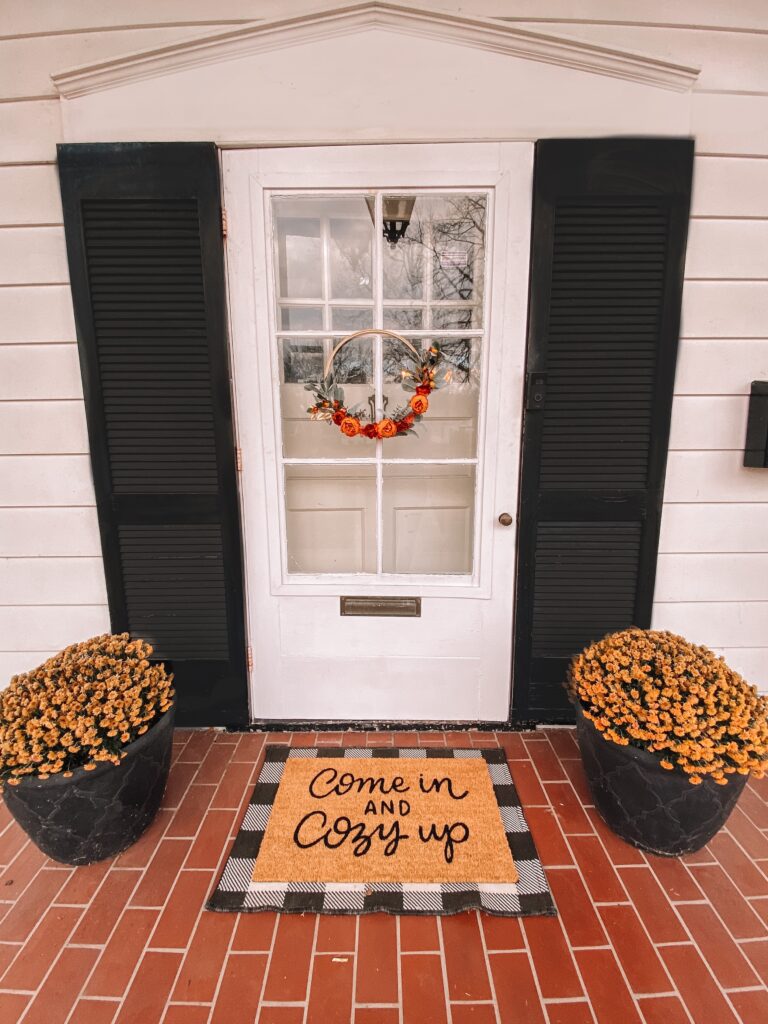
The first thing I did was use the wire cutters to cut off the flowers I wanted to use. Then using the glue gun, I placed the flowers where I wanted them to go. After that, all I had to do was hang the wreath on the front door. It was as easy as that.

It looks great against my white door and adds a little pop of color to the front. Definitely not a traditional Fall wreath, but I am loving the hues of orange I found.

Fall Hoop Wreath
Materials
- 14 Inch Embroidery Hoop
- Glue Gun
- Wire Cutters
- Faux Fall Flowers & Greenery
Instructions
- Cut Flowers & Greenery with wire cutters.
- Lay out your design & then start glueing the flowers on.
- Let cool and hang.