Halloween is just a few days away and your home doesn’t have one ounce of spooky decor in it. Don’t worry, we have got you covered! I’ve put together & tested some last minute projects to get your home Halloween ready just in time for the weekends festivities!
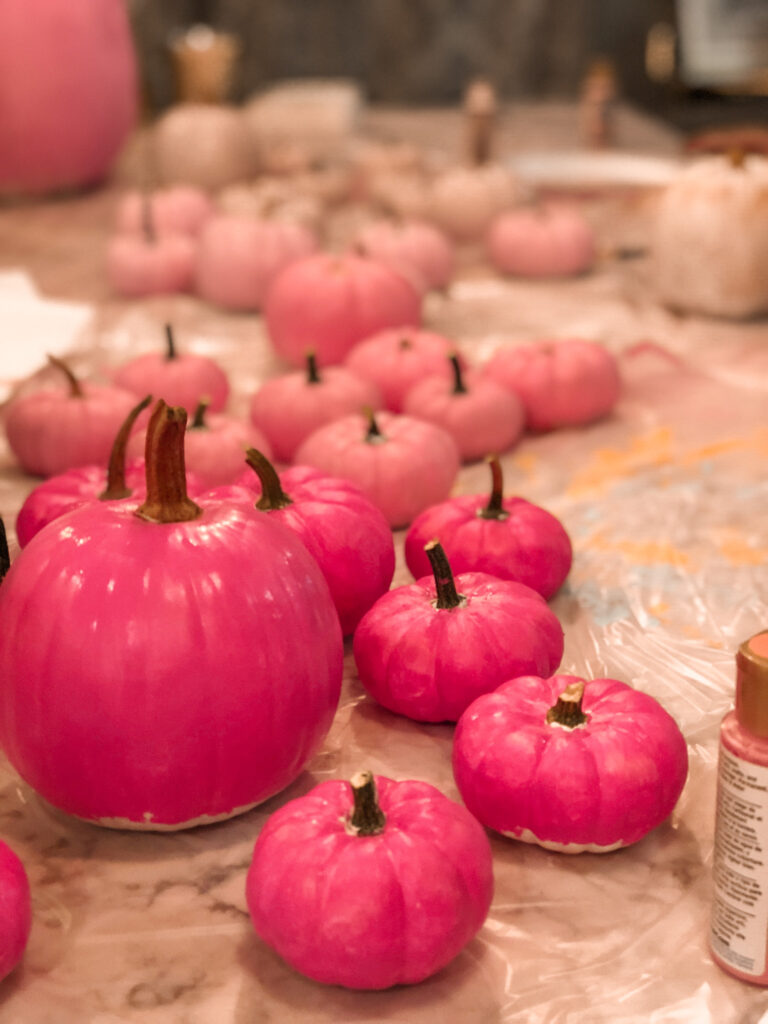
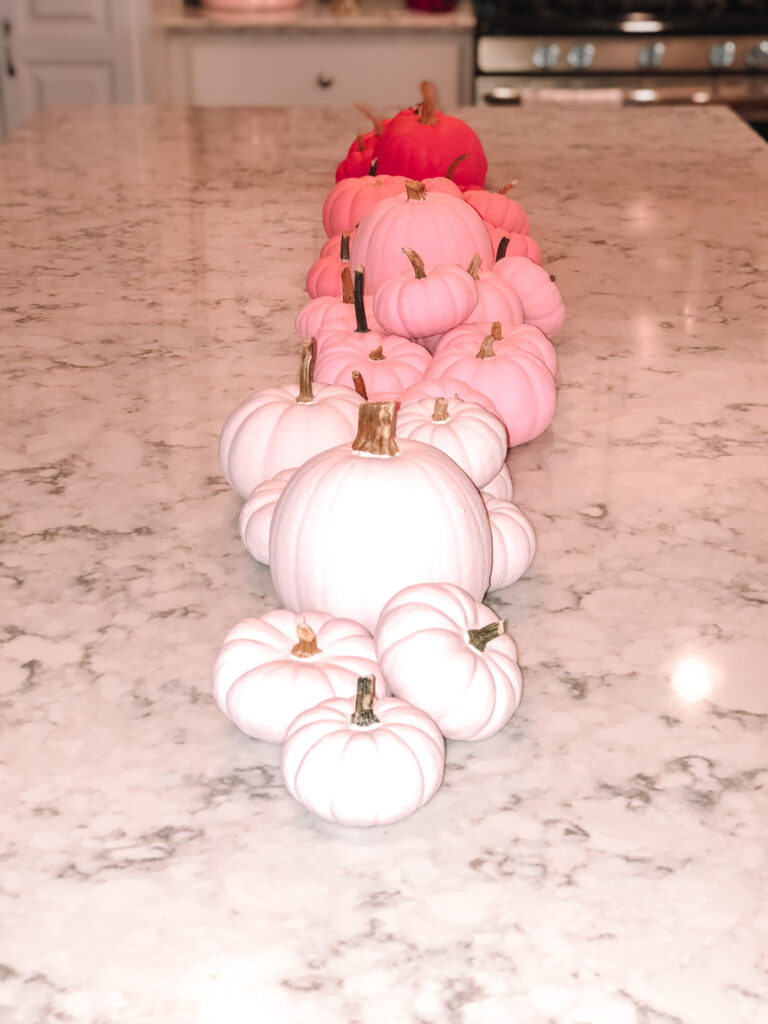
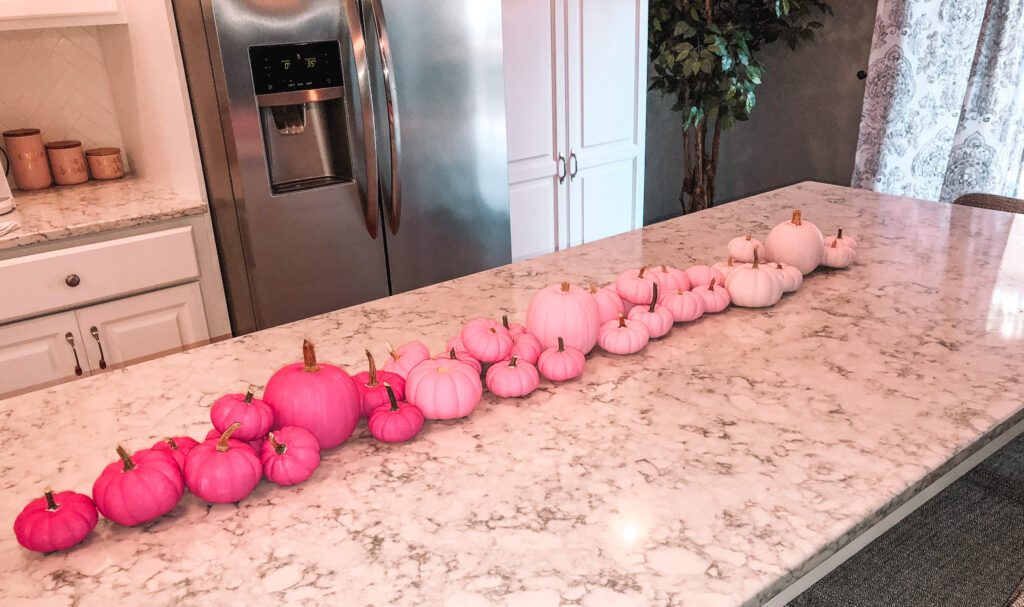
This colorful and fun project is perfect for transitioning from October to November. It can be used as a centerpiece for your Halloween party & dinner on Thanksgiving. I chose to go with different shades of pink because I was matching the kitchen decor, but feel free to test different shades for fall.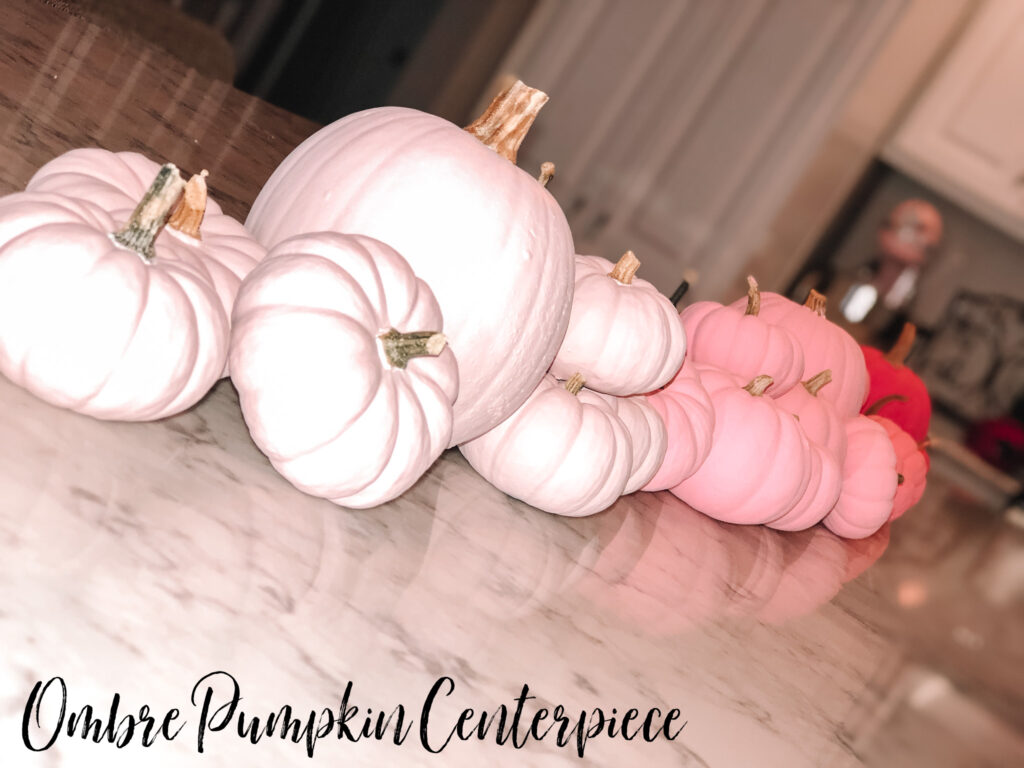
Materials Needed:
- Mini Pumpkins
- White Gesso
- Acrylic Paint (in shades of pink)
- Paint Brush
- Lay out all of your pumpkins as you plan to place them in your centerpiece. Assign colors to the pumpkins, making sure that each color blends into the next, and separate the pumpkins into color groupings.
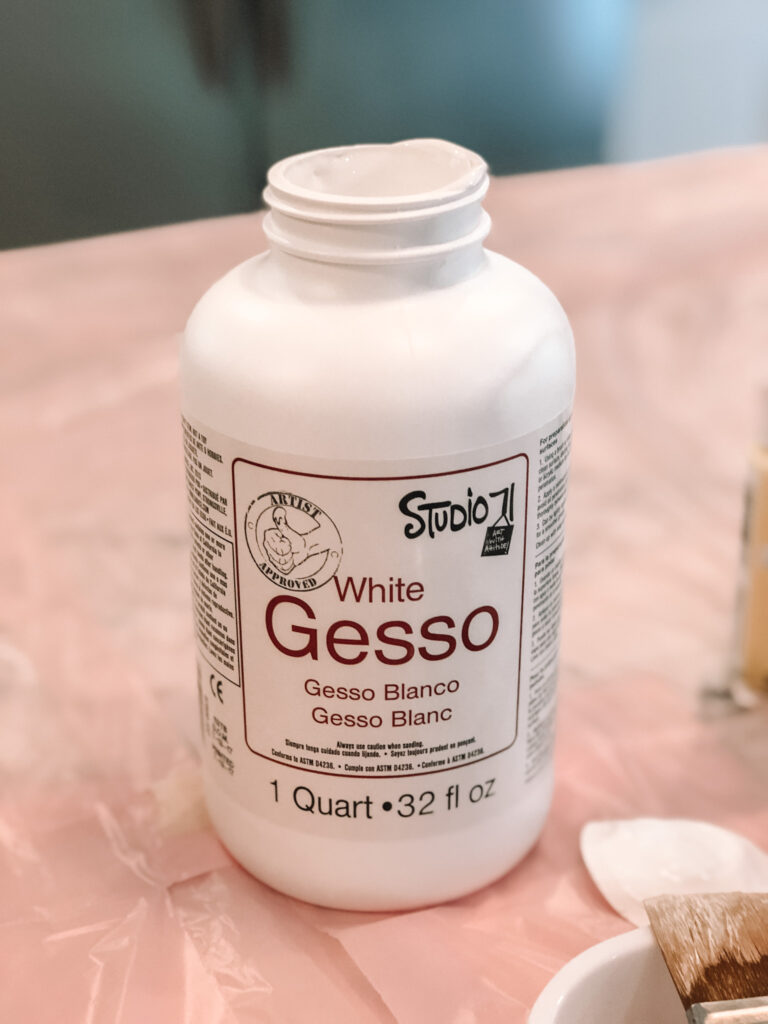
- Prime all of the pumpkins with one to two layers of gesso, leaving the stems as is.
- Paint the underside of all of the pumpkins in their assigned colors. When dry, flip and paint the rest. You may need to do a second coat.
- Arrange the dry painted pumpkins on your table for a fun and festive setting!
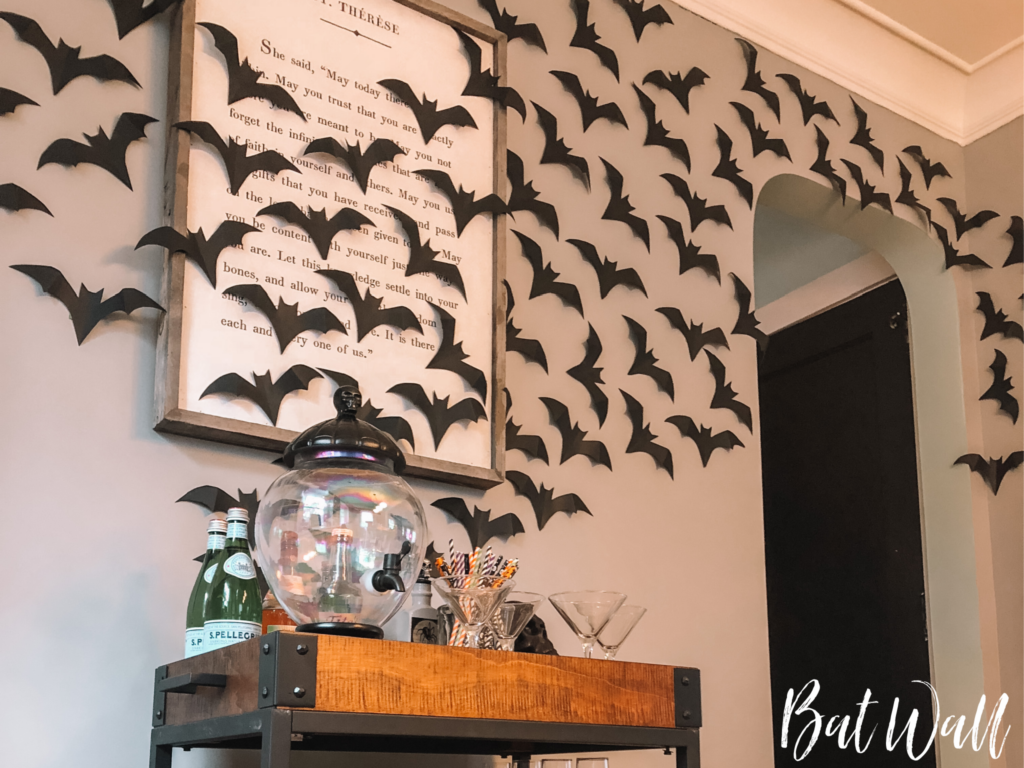
Why did the vampire need mouthwash?! Because he had “bat” breath….
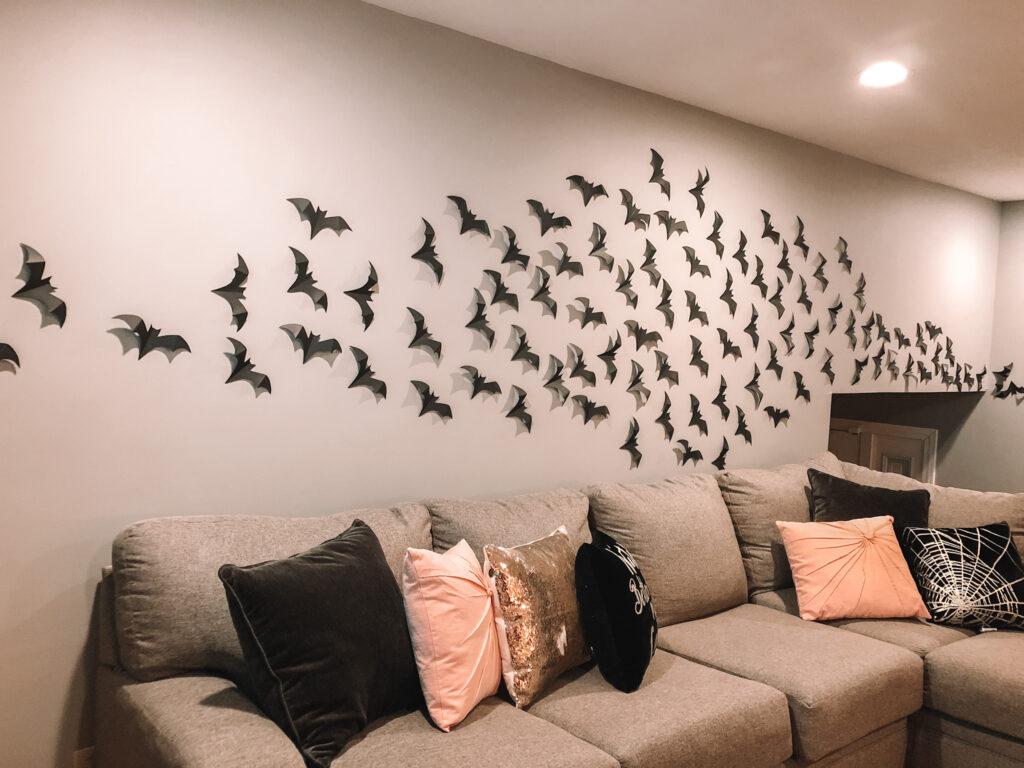
This bat wall is super easy to make and it always turns out amazing! I did this project a few years back and the best part is, the bats can be re-used year after year.
Materials Needed:
- Black Card Stock
- Scissors
- Masking Tape
- Print out this Martha Stewart Bat Template.
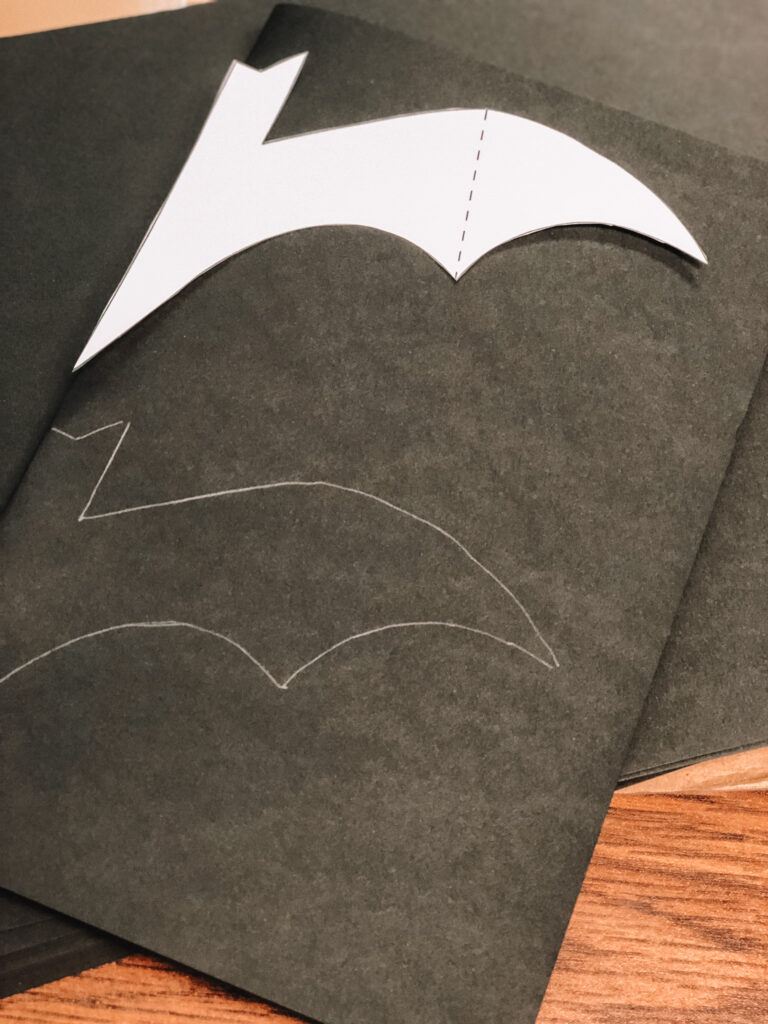
- Cut the bat template out & fold your card stock in half.
- Trace the bat onto your card stock. I was able to fit two bats on each sheet.
- Cut out the bats, and fold at the wing crease.
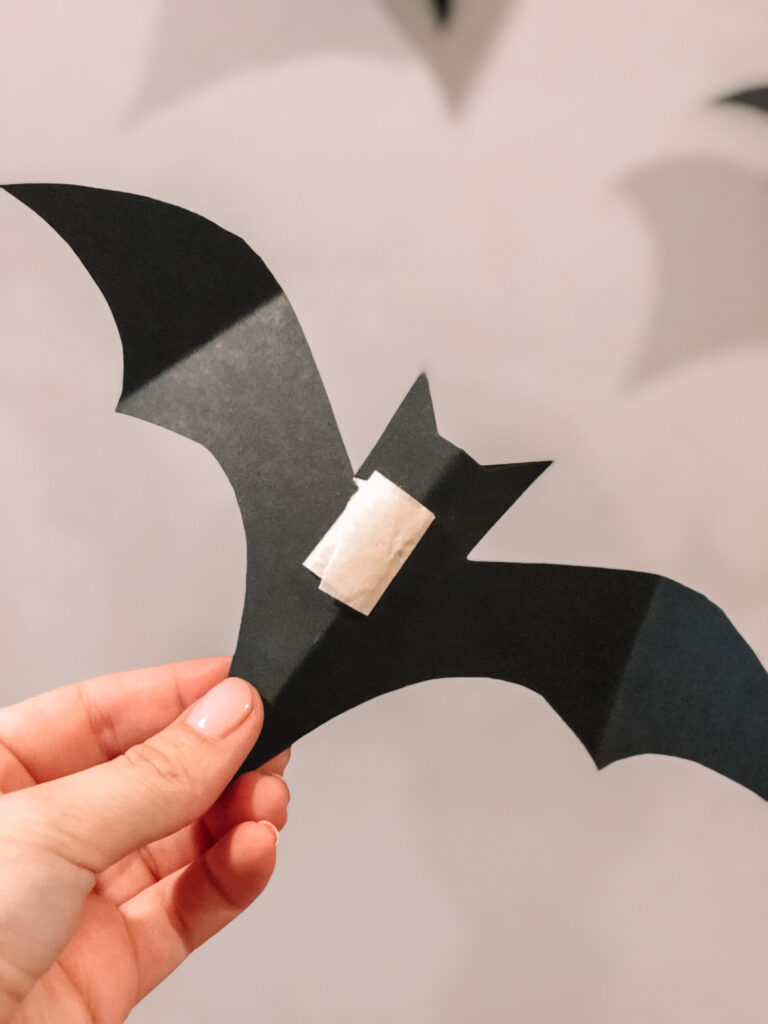
- Apply masking tape to the back of the bats & apply them to wall.
- I always try to make them look like they are flying in or out of a doorway and have them sweep across the room in different directions.
- This is perfect as a halloween decoration and it makes an awesome photo op wall!
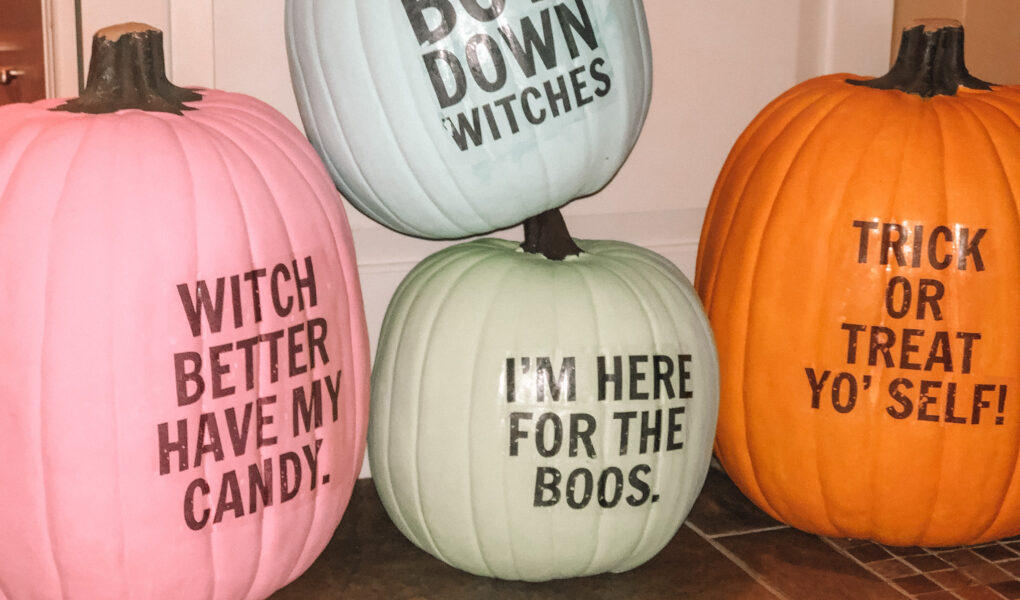
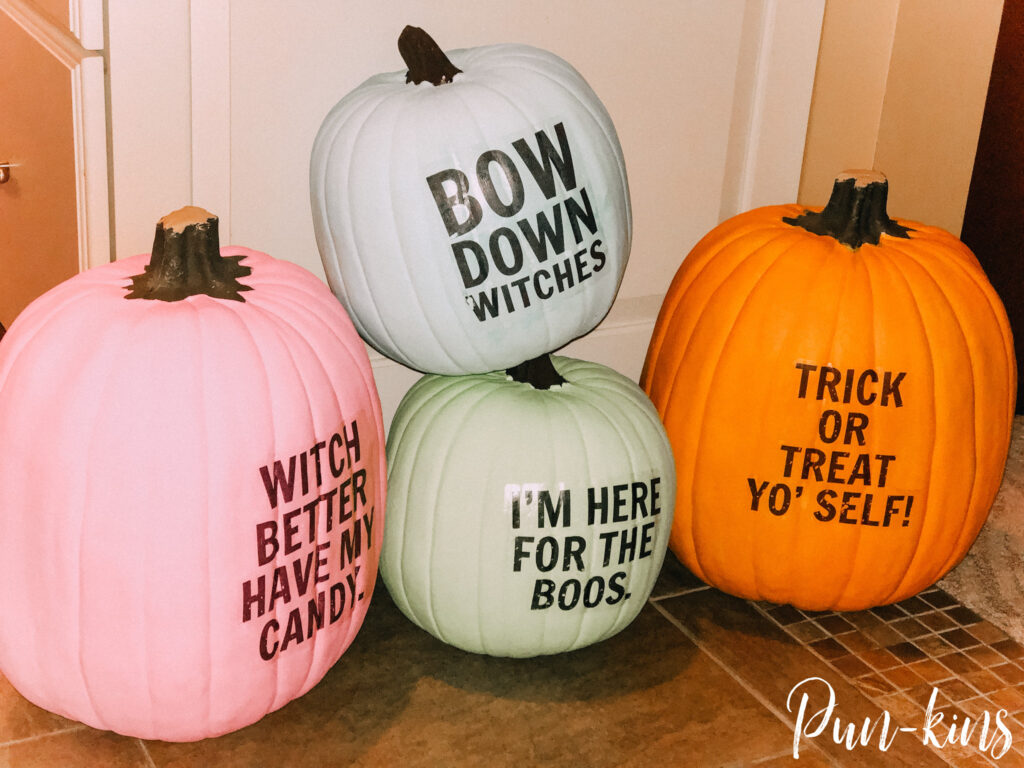
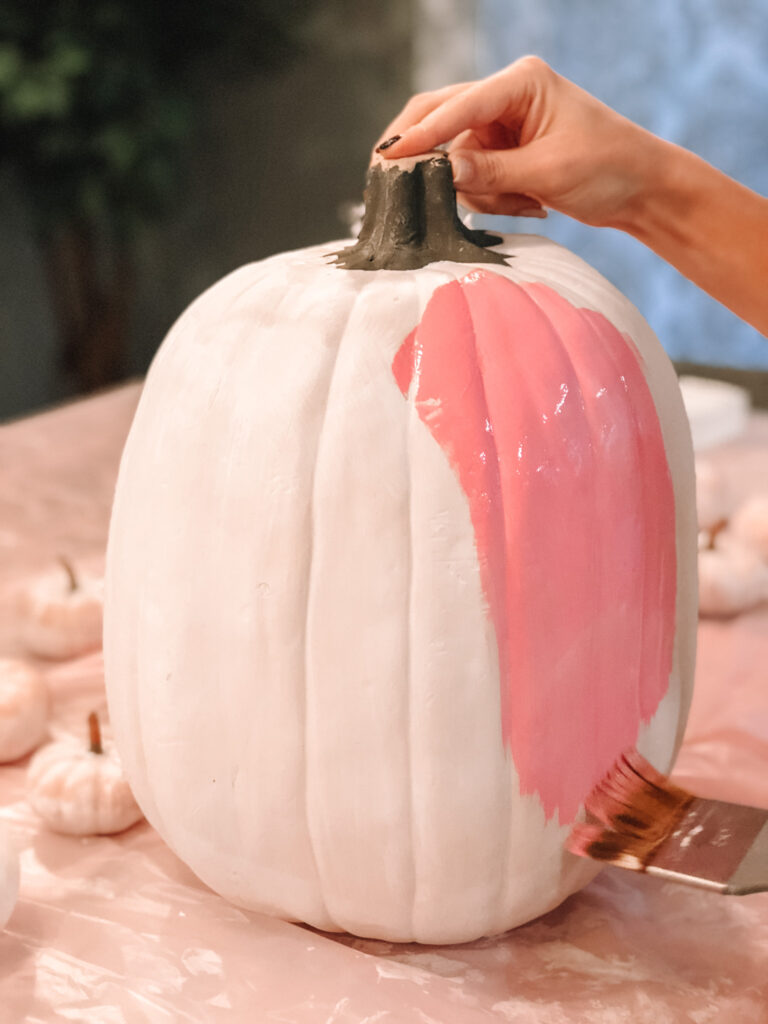
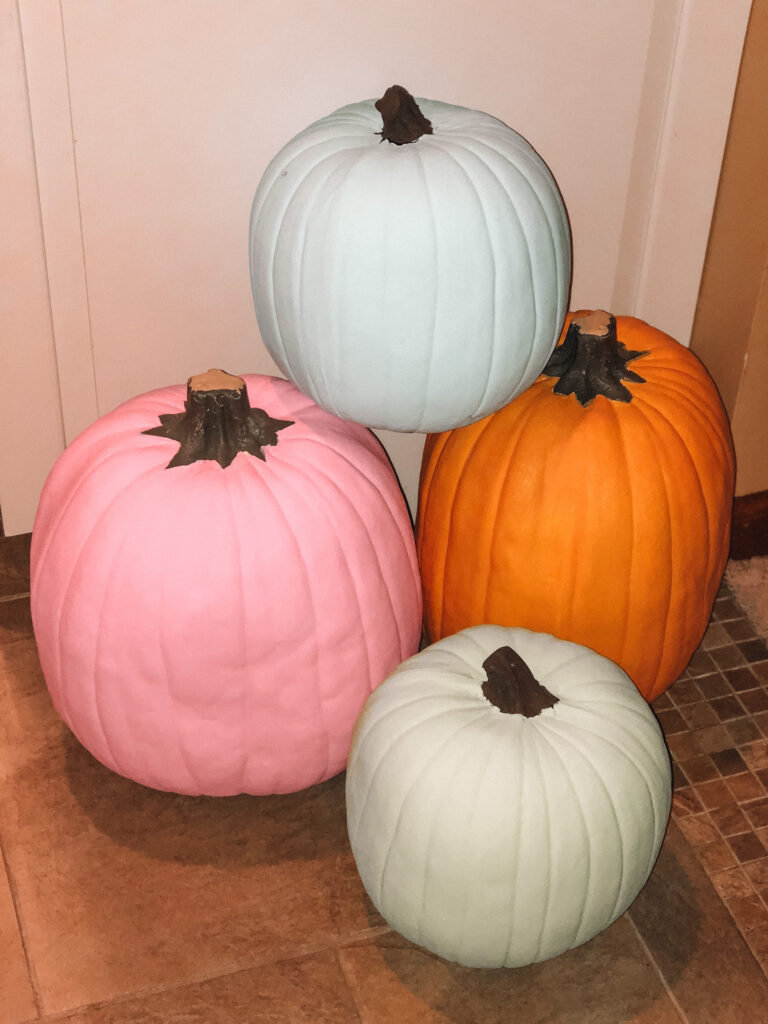
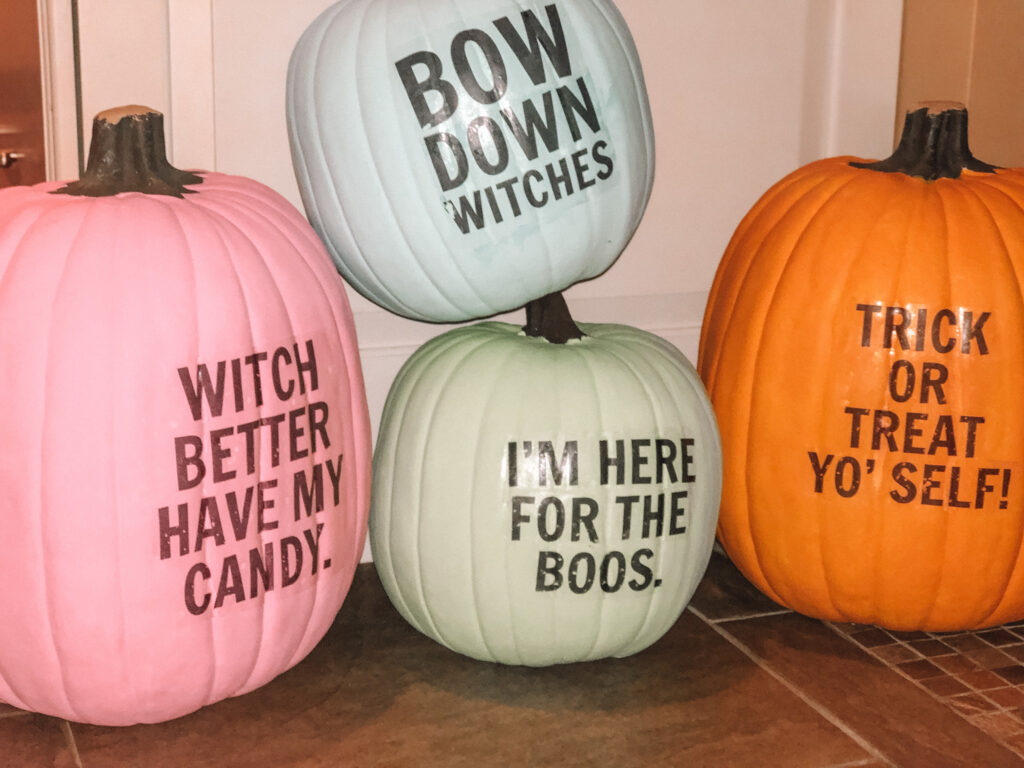
These pun-kins are so fun! I got the idea from Studio DIY who specializes in all things Do-It-Yourself. This is an awesome project to spice up plain pumpkins without having to carve them. I used carvable foam pumpkins so we can use these year after year!
Materials Needed:
- Pun Printables (Click HERE to download)
- Pumpkins (We used styrofoam carvable pumpkins so we can re-use them)
- Acrylic Paint
- Paint Brushes
- White Gesso
- Craft Paper
- Tattoo Paper
- Damp Towel or Paper Towel
- Paint your pumpkin whatever color you’d like! I recommend doing a white gesso layer first and then adding the color.
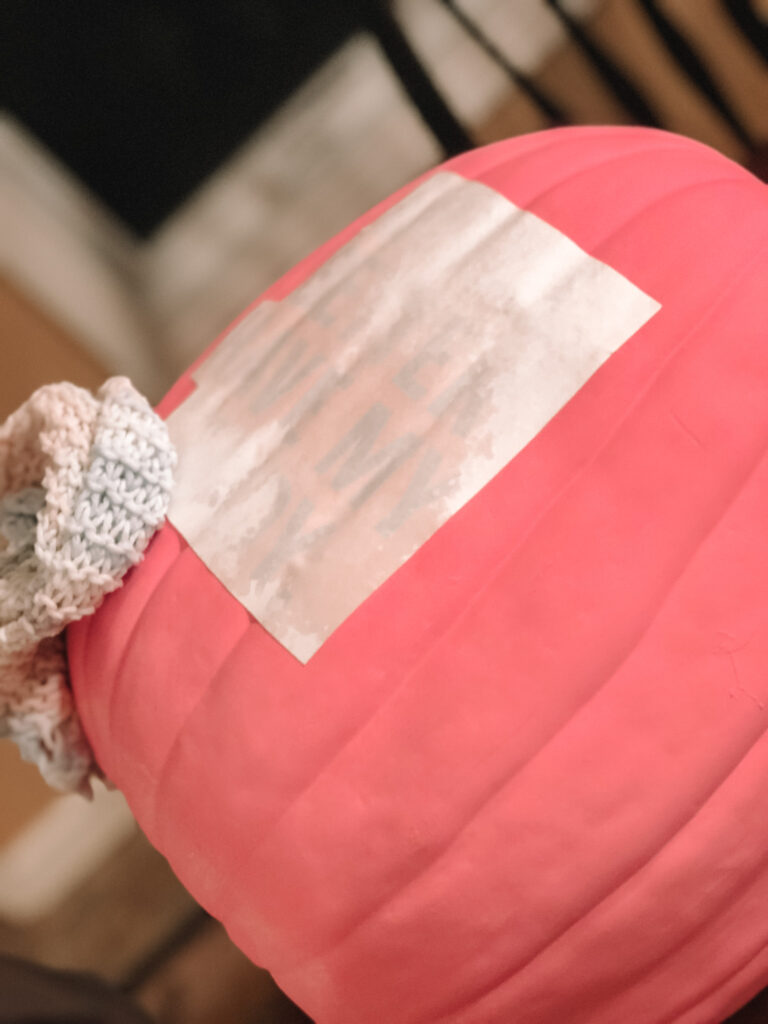
- Download and print the puns (which are mirrored on purpose) onto tattoo paper according to package instructions (all tattoo paper is different)
- You’ll follow all the same directions to apply the tattoo to the pumpkin, just as if you were applying it to your skin! For ours, once the ink dried, we had to press the clear adhesive sheet on top of the printable and then I cut out each pun separately.
- Have a wet rag/paper towel ready but DO NOT get the tattoo wet until it’s on the pumpkin. Peel the clear sheet off, leaving the adhesive behind and place the tattoo where desired. Rub with the wet cloth for 10-15 seconds.
- Carefully peel the paper off, leaving your tattoo behind! For the larger puns or if your pumpkin is super round, you can work in sections or cut the words of the tattoo apart and do one at a time.
- If you have good handwriting, you could write the phrases on with a paint marker. You could always buy individual letters and stick them on the pumpkins as well.

I hope these projects add a little color & character to your home just in time for Halloween! Want us to feature more of these DIY projects?! Leave us a comment below.
HAPPY HALLOWEEN!